Do you ever get frustrated after exporting your SVG and animating some elements only to have them go in the opposite direction you expected? In today’s quick tip, I’ll show you a little trick to solve Adobe Illustrator path direction.
It’s not obvious
If you draw a simple path yourself you probably know which way the path goes, but sometimes you’re merging, cutting and joining paths or you receive artwork from someone else. In those cases, it can quickly get confusing where they start and end.
This can be problematic when you’re animating the drawing of the element’s stroke or moving an element along a motion path.
Behold the humble stroke arrowhead
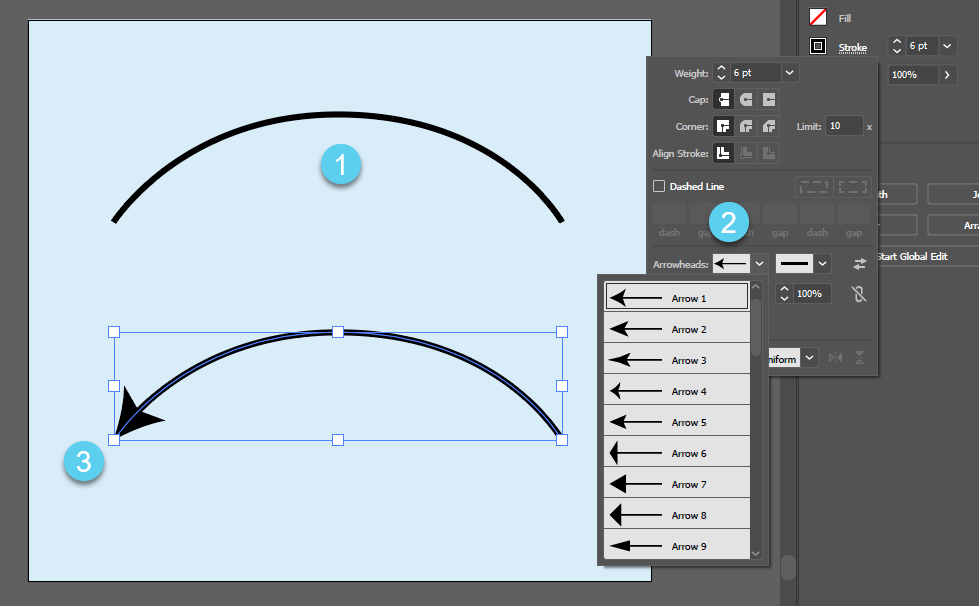
Here are two simple paths. Where do they start? Find out by opening the stroke panel and adding an arrowhead to the start of the path.

You can see on the first path (#1 in figure 1), we have no idea which way it goes. Pop open the stroke panel and add an arrowhead to the start (#2 in figure 1) and we can see the start point is on the left side (#3 in figure 1).
Reverse direction
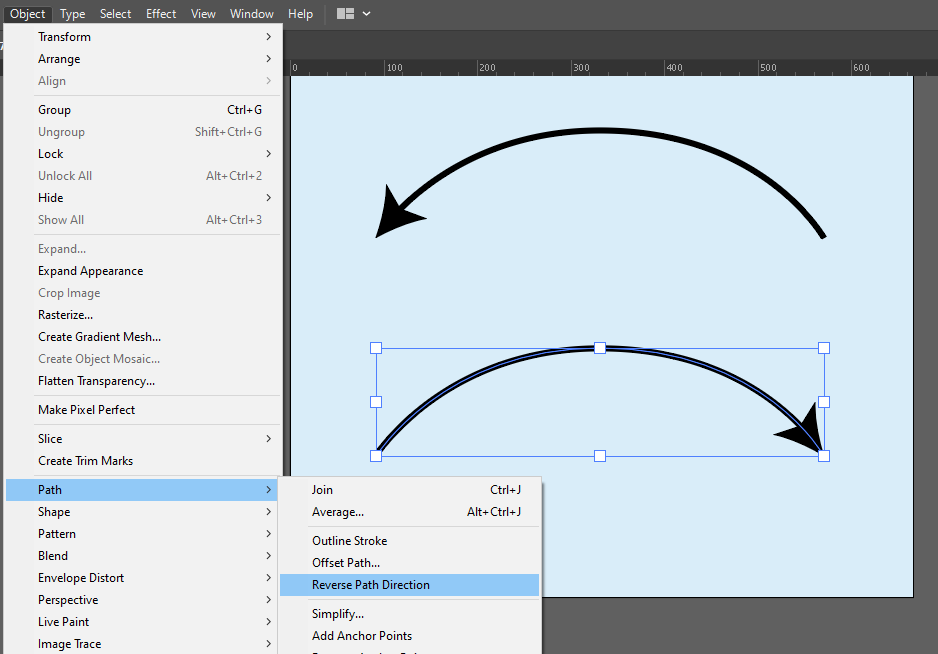
If that’s not the direction you’d like, you can simply reverse it. It’s under Object → Path → Reverse Path Direction. Once you have it to your liking, remove the arrowheads from all paths and export for animation.

The result
See the Pen Path Direction Tip by Craig Roblewsky (@PointC) on CodePen.
You can see in the demo that the top path draws from left → right and the bottom from right → left. Exactly as our starting arrowheads indicated.
Some of these Adobe Illustrator path direction problems can be solved via drawing from the opposite end or reversing an array of points once you’re coding, but with a little planning, you can eliminate those extra little headaches.
I hope this quick tip got you on the right path. Until the next time, keep your pixels movin’.


